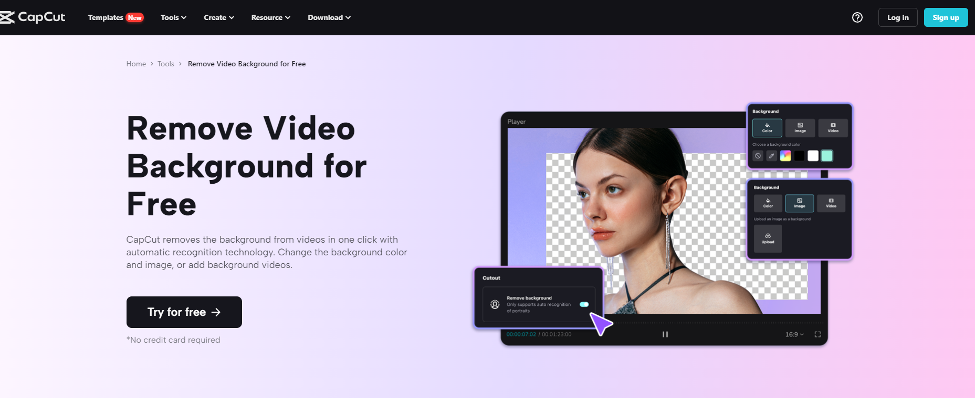
Transitions play a crucial role in video editing, seamlessly connecting different clips and enhancing the overall flow and visual appeal of your videos. CapCut, a versatile video editor online free tool, offers a wide range of transition effects and features like background remover to help you create professional-looking edits. In this step-by-step guide, we will take you through the process of mastering transitions in CapCut.
Whether you’re working on a vlog, a short film, or a social media video, understanding and utilizing transitions effectively can elevate the quality of your edits. Transitions allow you to create smooth and visually engaging connections between scenes, adding polish and creativity to your videos.
Join us as we delve into the world of transitions in CapCut. We will explore different types of transitions, demonstrate how to apply them, and provide tips on how to use transitions creatively to enhance your storytelling. By the end of this guide, you will have the knowledge and skills to take your video editing to the next level with seamless and captivating transitions.
Let’s embark on this journey of mastering transitions in CapCut and unlock the power of visual storytelling.
Image source: Capcut
Table of Contents
Understanding Transitions
A. Definition of Transitions in Video Editing
Transitions in video editing refer to the techniques and effects used to smoothly connect one video clip to another. They bridge the gap between scenes, creating a seamless flow between different shots and enhancing the overall visual storytelling. Transitions can be as simple as a straightforward cut or as complex as a creative blend of visual elements, depending on the desired effect.
B. Importance of Transitions in Enhancing Visual Flow and Storytelling
Transitions play a vital role in video editing by improving the visual flow and coherence of a video. They help guide the viewer’s attention and maintain engagement throughout the viewing experience. Well-executed transitions create a natural progression between scenes, preventing abrupt or jarring cuts that can disrupt the narrative. They allow for smoother transitions of time, location, or mood, contributing to a more immersive and professional-looking final product.
C. Types of Transitions and Their Effects on the Viewer
There are various types of transitions that can be used in video editing, each with its unique effect on the viewer. Some common types include:
Cut: The simplest and most direct transition, where one clip abruptly ends, and the next clip begins. It provides a clean and straightforward transition, often used for fast-paced or dynamic sequences.
Fade: In a fade transition, one clip gradually fades out while the next clip simultaneously fades in. Fades can convey a change in time, location, or mood, creating a smooth and subtle transition between scenes.
Dissolve: Dissolve transitions involve blending two clips together gradually. It creates a dreamy or nostalgic effect, often used to transition between flashbacks or to denote a change in time or perspective.
Wipe: A wipe transition occurs when one clip replaces another by sliding, revealing, or wiping across the screen. Wipes can add a sense of movement and excitement, drawing attention to the transition itself.
Zoom: Zoom transitions involve zooming in or out from one clip to another. It can add a dramatic or dynamic effect, highlighting specific details or creating a sense of scale and perspective.
Crossfade: A crossfade transition blends two clips together by gradually increasing the opacity of the incoming clip while decreasing the opacity of the outgoing clip. It provides a smooth and seamless transition, often used for audio transitions or to create a gentle change in time or location.
Understanding the different types of transitions and their effects on the viewer allows you to make intentional choices in your editing process. By selecting appropriate transitions that align with your video’s tone, style, and narrative, you can enhance the overall visual flow and storytelling, creating a more impactful and engaging viewing experience.
Image source: Capcut
Step-by-Step Guide: Mastering Transitions in CapCut
A. Importing Your Video Footage into CapCut
Launch CapCut on your device.
Create a new project by tapping the “+” button or selecting “New Project.”
Choose the desired aspect ratio and resolution for your project.
Tap on the import button within CapCut to access your device’s gallery.
Select the video clips you want to work with and import them into CapCut.
B. Navigating the Transition Library in CapCut
Once your video footage is imported, it will appear on the timeline at the bottom of the screen.
Locate and tap on the “Transitions” button or icon in the toolbar.
This will open the transition library, where you can explore and preview the available transition effects.
C. Previewing and Selecting the Desired Transition Effect
Scroll through the transition library to browse the different effects.
Tap on a transition effect to preview it on the video clip in the preview window.
Take note of how the transition affects the visual flow and overall aesthetic of your video.
Continue previewing different transitions until you find the one that best suits your video’s style and desired effect.
D. Applying Transitions Between Video Clips
To apply a transition, position the playhead on the timeline where you want the transition to occur.
Tap on the transition effect you have chosen in the transition library.
CapCut will automatically insert the selected transition between the two adjacent video clips.
The transition will be visible on the timeline as a separate element, indicating its duration and position.
E. Adjusting the Duration and Timing of Transitions
To adjust the duration of a transition, tap on the transition element on the timeline.
Drag the edges of the transition element to increase or decrease its duration.
To fine-tune the timing of the transition, tap on the transition element and use the trimming handles to adjust its start and end points.
Preview the transition to ensure that the timing and duration are to your liking.
Mastering transitions in CapCut involves exploring the available options, selecting suitable effects, and applying them with precision. By following these step-by-step instructions, you can confidently navigate CapCut’s transition library, experiment with different effects, and seamlessly incorporate transitions into your video editing workflow.
Remember to consider the style and tone of your video, as well as the desired impact, when selecting and adjusting transitions. With practice and creative exploration, you will enhance the visual flow and storytelling of your videos using CapCut’s powerful transition capabilities.
Image source: Capcut
Tips for Using Transitions Creatively
A. Matching Transitions to the Tone and Style of Your Video
Consider the overall tone and style of your video. Is it upbeat and energetic, or calm and contemplative? Choose transitions that complement the mood and atmosphere you want to convey.
Pay attention to the pacing and rhythm of your video. Use faster transitions for quick cuts and dynamic sequences, while slower transitions work well for more contemplative or emotional moments.
B. Using Transitions to Convey Emotions and Enhance the Narrative
Experiment with different transitions to evoke specific emotions. For example, a fade or dissolve can create a dreamy or nostalgic atmosphere, while a quick cut or zoom can add excitement and energy.
Use transitions strategically to emphasize important story beats or highlight key visual elements. A well-placed transition can draw attention to a significant moment, build suspense, or create a sense of surprise.
C. Experimenting with Different Types of Transitions for Visual Impact
Don’t limit yourself to one type of transition. Mix and match various transitions throughout your video to keep the visual flow engaging and dynamic.
Try combining different transition effects within a sequence to create unique and visually captivating moments. For example, blending a wipe transition with a zoom can add a dynamic and seamless movement between scenes.
D. Maintaining Consistency and Avoiding Excessive Use of Transitions
Ensure that the transitions you choose align with the overall aesthetic and style of your video. Consistency in transition choices helps create a cohesive and polished look.
Avoid overusing transitions, as excessive or gratuitous transitions can distract the viewer from the content and disrupt the flow of the narrative. Use transitions purposefully and sparingly to maintain focus on the story.
By incorporating these tips into your video editing process, you can use transitions creatively to enhance the visual impact and storytelling of your videos. CapCut provides a wide range of transition effects and options to explore, allowing you to experiment and find the perfect transitions that elevate your video edits to the next level. Remember to stay true to the tone and style of your video, use transitions strategically, and maintain consistency for a visually appealing and engaging final product.
Conclusion
Mastering transitions in video editing is a key skill that can greatly enhance the visual flow and storytelling of your videos. In this step-by-step guide, we explored how to master transitions using CapCut, a versatile video editing tool. We learned the importance of transitions in creating seamless connections between video clips, improving the overall coherence and engagement of our edits.
Understanding the different types of transitions and their effects on the viewer allows us to make intentional choices in our editing process. By selecting appropriate transitions that align with the tone, style, and narrative of our videos, we can elevate the visual impact and create a more immersive viewing experience.
The step-by-step guide walked us through importing video footage, navigating the transition library in CapCut, selecting desired transition effects, applying transitions between clips, and adjusting their duration and timing. By following these instructions, we gained the knowledge and skills to confidently incorporate transitions into our video editing workflow.


